Creating your first Agent
Your personal AI-assisted Task and Workflow automation.
PromptBros Agents are the ultimate productivity boosters. Create them to act Standalone, or combine them for powerful AI Task workflows.
This video shows how to get started with your firt simple AI Agent.
You can also follow the step-by-step instructions below.
How-To Create an Agent
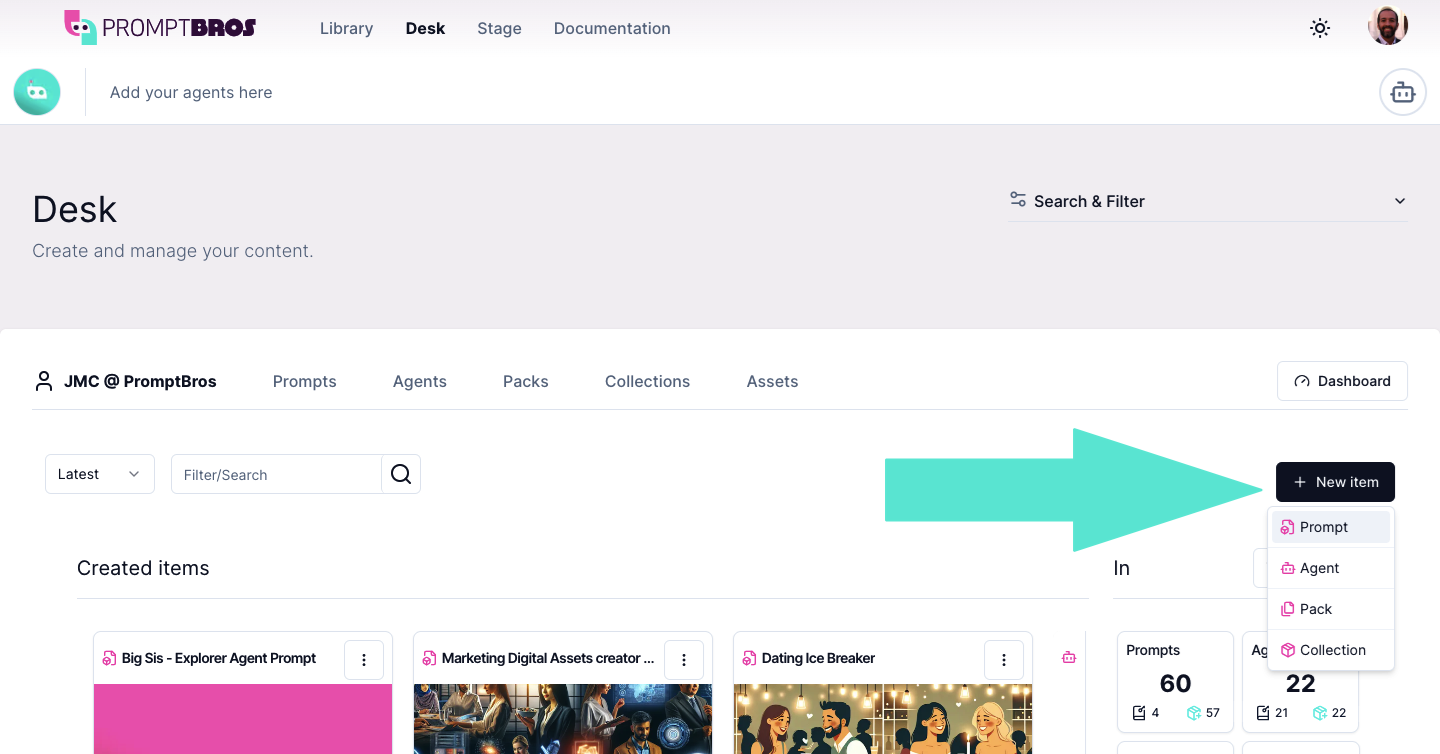
In the main Desk view click + New Item and select Agent. Or on the Agents tab, simply click + New Agent.
Please note that only Creators can build Agents. Please upgrade your plan to create your first agent!
Agent Identification
1. Confirm basic Agent details
As you start creating an Agent you get a pop-up to enter the basic data:
- Give your Agent a Title.
- Select your Agent Category (eg. Text-to-Text, Text-to-Image, Text-to-Code, etc.) and Model (eg. Perplexity, Claude, OpenAI's GPT, Gemini, etc.) that best suits your Prompt - see Supported Models for more info.
- You can also select an Agent Template to follow.
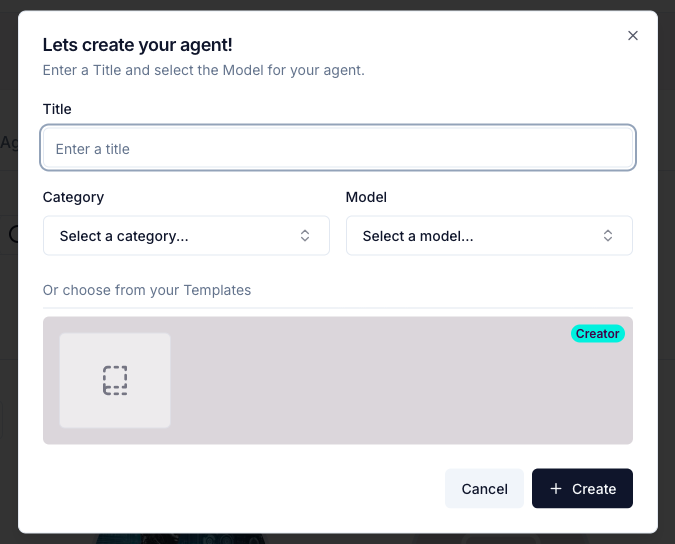
Then you can click Create and jump to the main editing view.
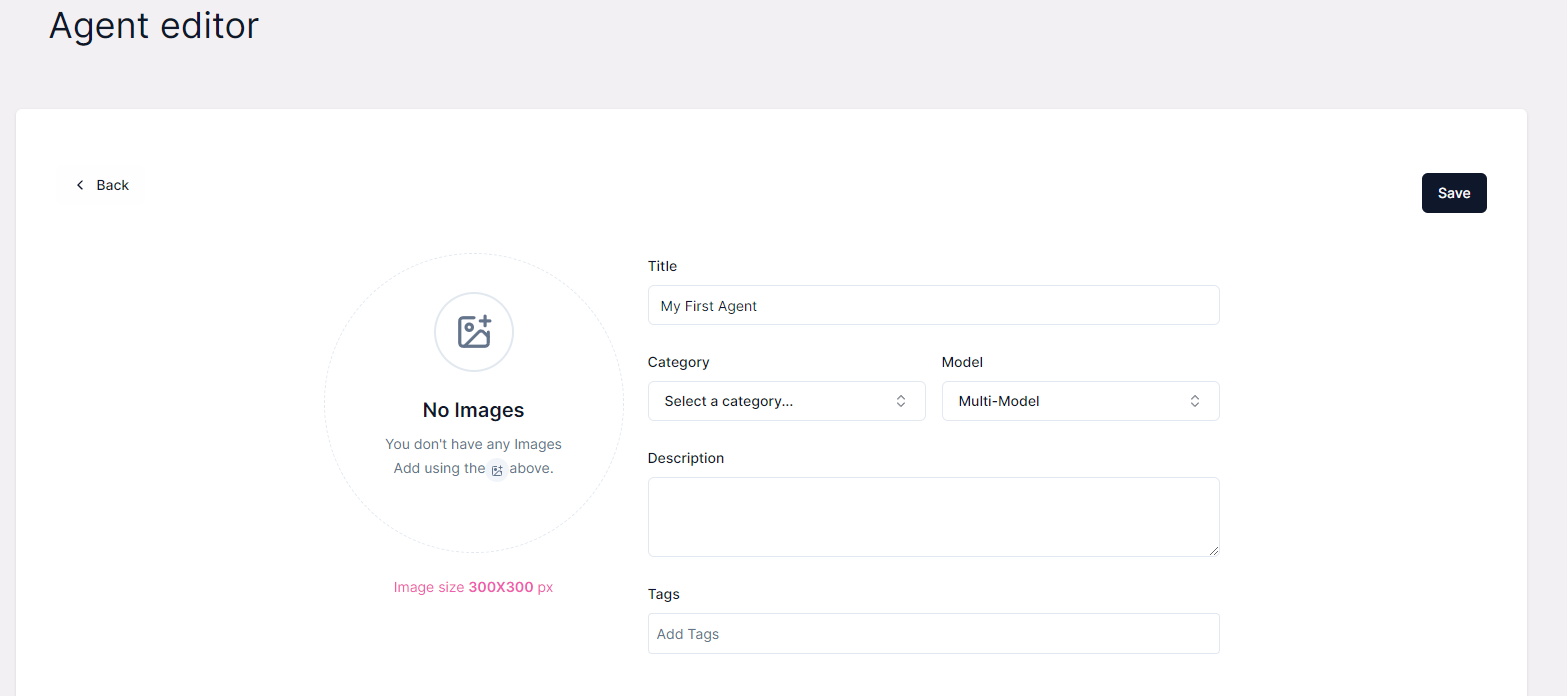
2. Make your Agent Identifiable and Searchable (recommended)
In the main Agent Overview where you can:
- Upload, select, or Generate an Image to identify your Agent - see Generate an Image.
- Add a Description of what your Agent is for.
- Add one or more Tags for Agent quick search and filtering.
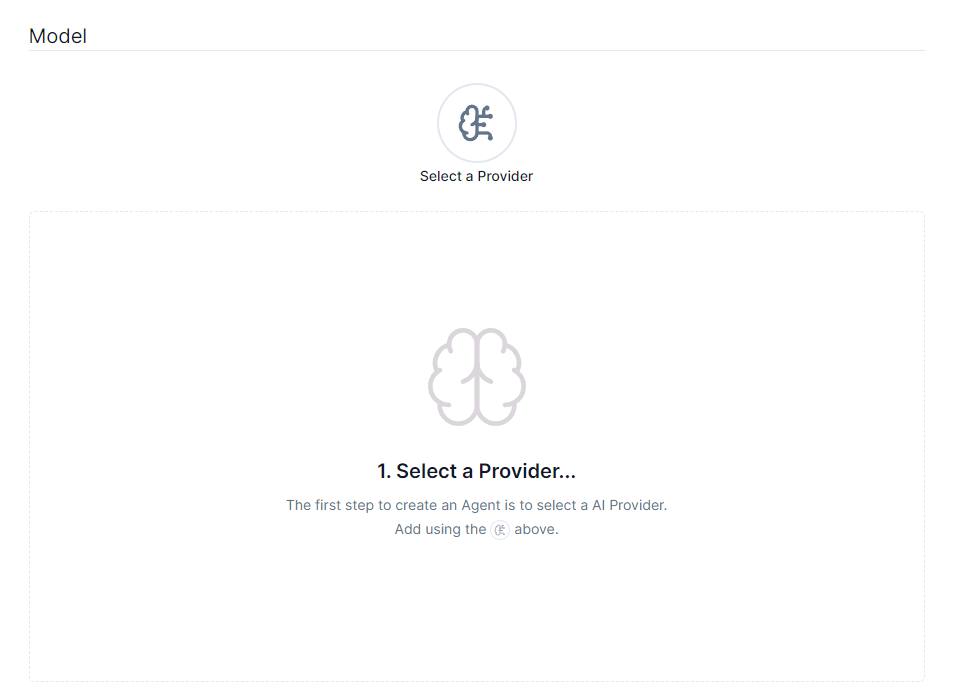
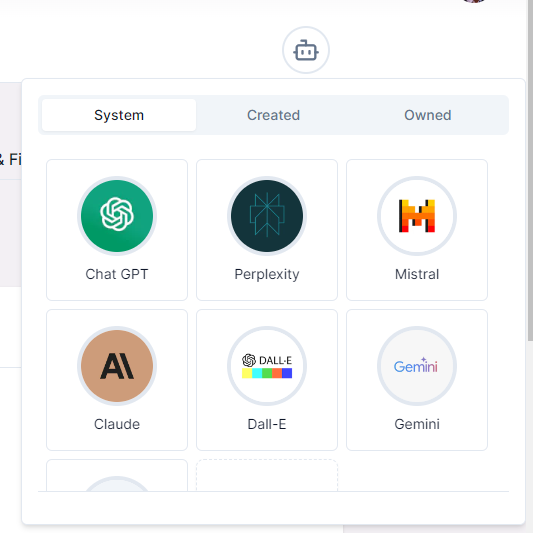
Select your AI Provider and Model
1. Select a Model Provider Click on Select a Provider
Use the Drop-down list to select a Model Provider that you want to use for your Agent.

1. Specify a Model
You can select a specific Model version you want your Agent use. You can also leave it unselected and then choose when launching your Agent.
To remove a Selection you can click on it, and if you leave the selection Blank then the user can select it at the start of their Agent Interaction.
Adding a Prompt
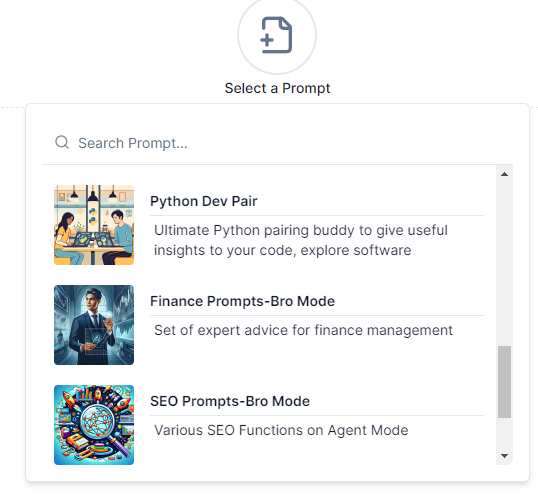
1. Select your Agent's Prompt
User-created Agents will have a Prompt associated with them.
Click Select a Prompt
And search from your Prompt list.
You can see Prompt Details directly in your Agent Editor too.
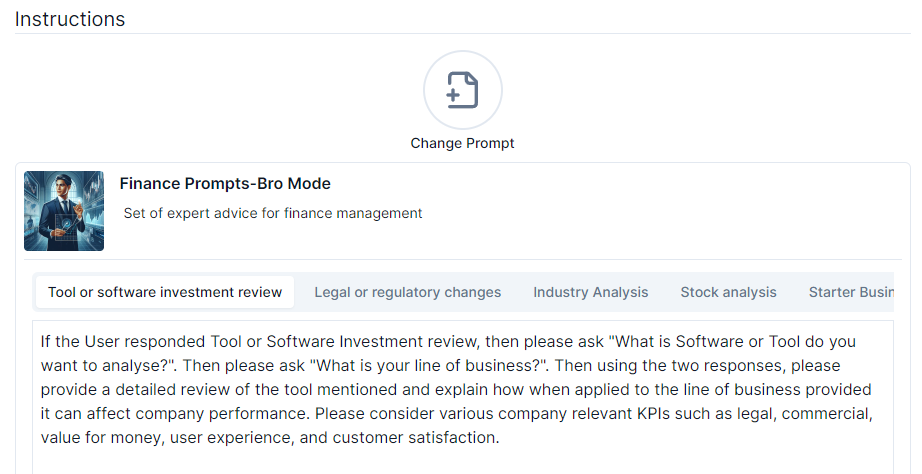
Tip: The Prompt you use can have one or many Contents as start-up instructions to your Agent. See build your first prompt for more info.
You can also create a brand new Prompt and navigate directly from the Agent.
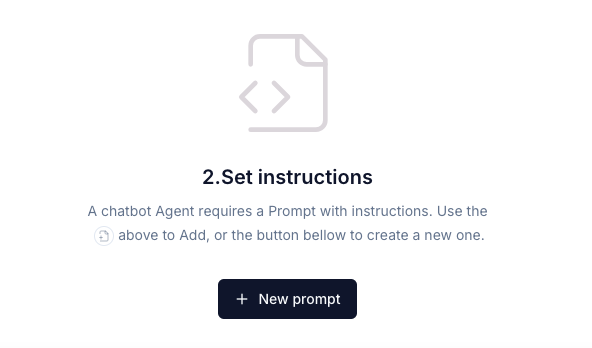
Tip: see build your first prompt for more details on Prompt Creation.
2. ChatBro Toggle
- When active, your Agent will auto-start all initial System Prompts by default. This allows for automation of setup and even introduction of content at the start of User Interaction.

3. Add Agent Notes
- PromptBros provides a Rich Content Notes Editor so your Agents can have descriptions, instructions, Youtube or URL links, and more. Please be mindful of our Terms & Conditions.
If you are looking for Agents for RAG where you can provide documentation or information to leverage as part of the context for your Agent, please refer to RAG page.
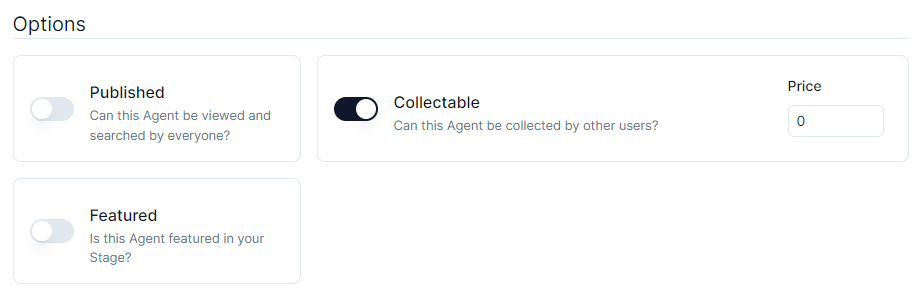
Select Your Visibility options
As a final step, you should decide who can see and Collect your Agent using 3 simple options:
A. Published - if selected, your Agent can be viewed and searched publicly in the Library.
B. Collectable - if selected, your Agent can be collected by any user (including Link share).
When Agents are Collectable, they can have a Price set. In order to Collect them, Users agree to transfer Credits into your Account.
C. Featured - if sellected, your Agent will be featured in your Stage (Check Stage for more).
Find out more about the Visibility Options on our Creators and Owners Doc.
Save
Please don't forget to Save your work when you're done!
Editing your Agent
We have made it simple for you to Edit your agent and any contents from the Chat screen.
Simply start a new Chat and the Edit button will appear.
Tip: You can also use the maximise button to put your agent chat in full screen so you can focus.
Quick-Agent Tab
To help you navigate easily through your AI workflows, we built the Agent Tab as a configurable navigation.
Use the Add Agents icon on the top right in the Library or Desk modes.
Add your favourite System Agents
and mix them with your Creations and Collected Agents.
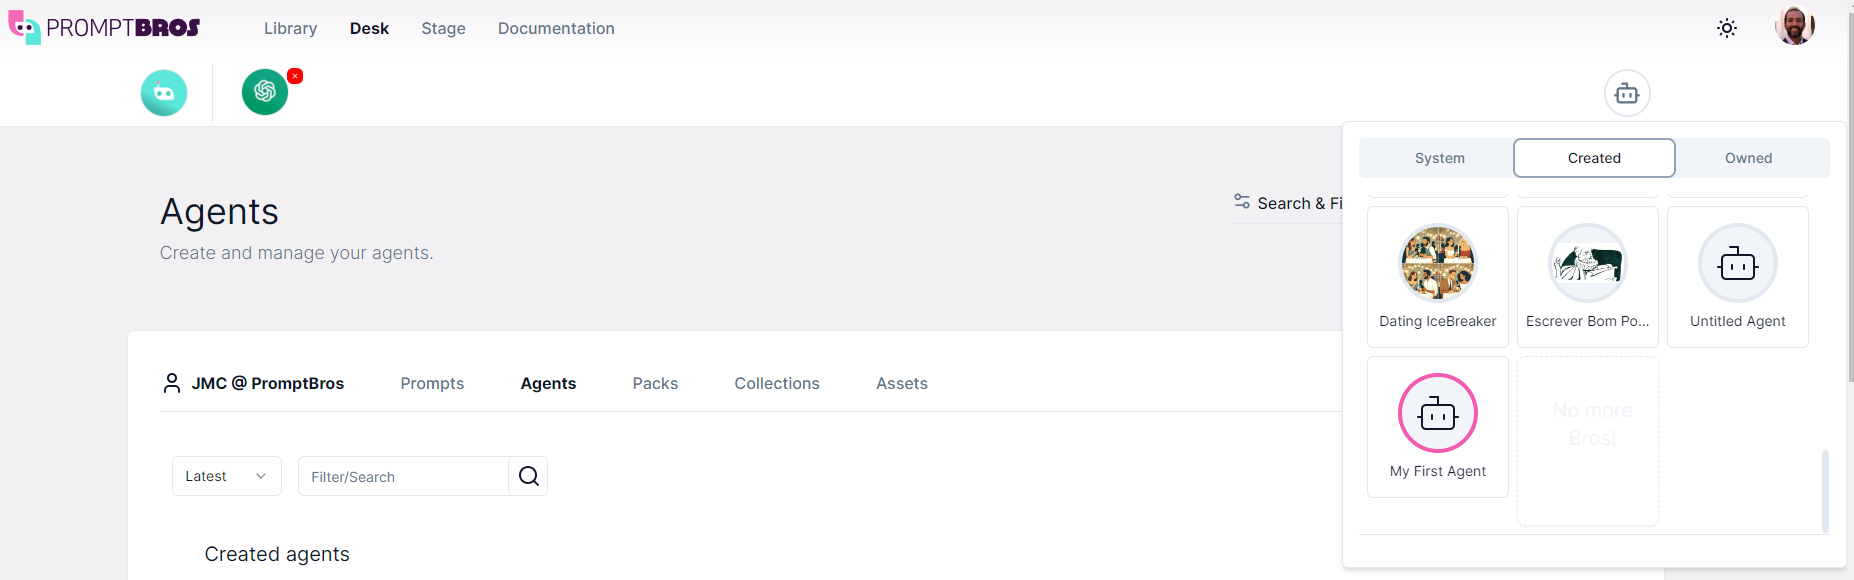
You can add up to 8 Agents and edit the list at any time for quick toggling between your most used.
